
I wanted to write a quick guide on Azure NetApp Files in Microsoft Azure, with info on how the service works and how to deploy it. I say quick but ended up adding more technical details than one might say is required – that’s just he engineer in me. I hope you find this helpful and relatively straight forward.
Azure NetApp Files – What Is It?
Azure NetApp Files (ANF) is an Azure native deployment of NetApp’s ONTAP platform in their cloud environment. ANF is simply high performance file shares using NFSv3, NFSv4.1, SMB, or a combination.
As part of a partnership between Microsoft and NetApp there are all flash hardware platforms deployed across most of Azure’s regions globally. As an Azure native solution, provisioning and billing is all done through the Azure Portal. You quite literally don’t need to know anything about NetApp or ONTAP to make use of ANF.
The performance part, which I’ll get into more next, is the main use case. ANF provides better performance than Azure’s native file solution which makes it key for databases, VDI, and other workloads that require consistent, and scalable, throughput.
Performance Scaling
When deploying ANF you’ll have to select from one of three services levels: Standard, Premium, and Ultra. Each service level maps to a different level of throughput: 16 MiB/s, 64 MiB/s, and 128 MiB/s respectively. Performance stacks in 1 TiB increments.
Thus if you have a pool of 20 TiB of Premium (64 MiB/s) you’ll have a cumulative performance throughput of 1280 MiB/s from that pool. This effectively becomes a performance quota.
When you create a volume within that pool you’ll pull from the available throughput quota. If I create a 4 TiB volume, that volume will have 262.14 MiB/s of effective throughput.
With a bit of planning you can dial in available performance for your specific use cases.
Prerequisites
Networking seems to be the main difficulty point when it comes to cloud services. If I went into all the details behind an ANF deployment this certainly wouldn’t be a “quick” guide. I suggest reading through the full networking guide before deploying ANF.
I do want to call out the key requirement for a delegated subnet within your VNet. ANF is deployed within this subnet with IP addresses pulled from the space. Any other subnets in the VNet should be able to natively access the ANF shares and you can always set up peering or a VPN to provide access from other VNets.
Setting up a delegated subnet is straight forward. Within your existing VNet add a subnet, throw in all the pertinent networking info, and select Microsoft.Netapp/volumes as the service under the Subnet Delegation section.

Honestly, I’m so inept at networking that the longest part of this entire process was just trying to figure out a proper subnet address range within my VNet. Subnet delegation and subsequent ANF deployment was easier than brewing a cup of coffee.
Deploying Azure NetApp Files
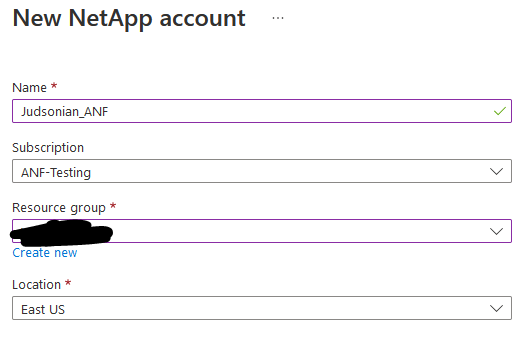
Within the Azure Portal look for Azure NetApp Files, then click the + Create button on the top left and fill in some basic details. Standard Azure functionality/workflow.
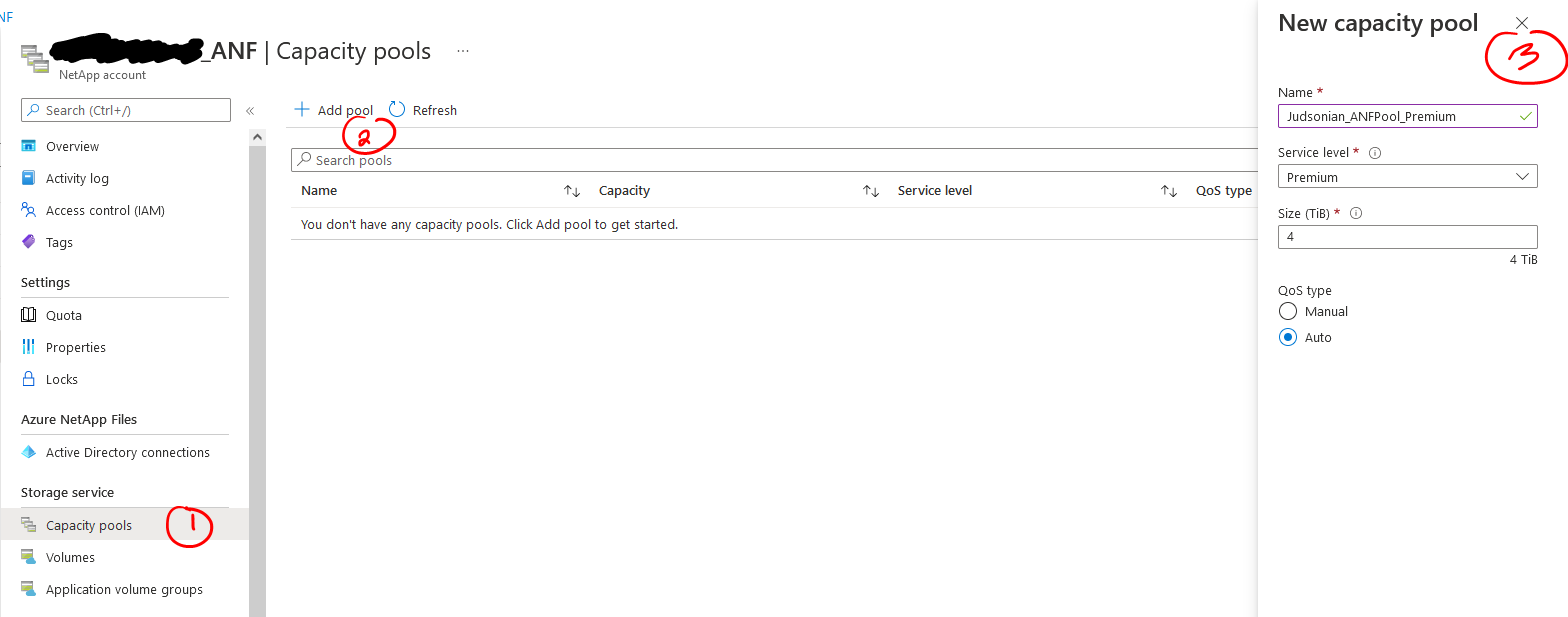
Once that’s created enter the resource and click Capacity Pools on the left hand menu, + Add Pool, then fill in the pool details. Here is where you can select the service level and capacity for the whole of the pool.
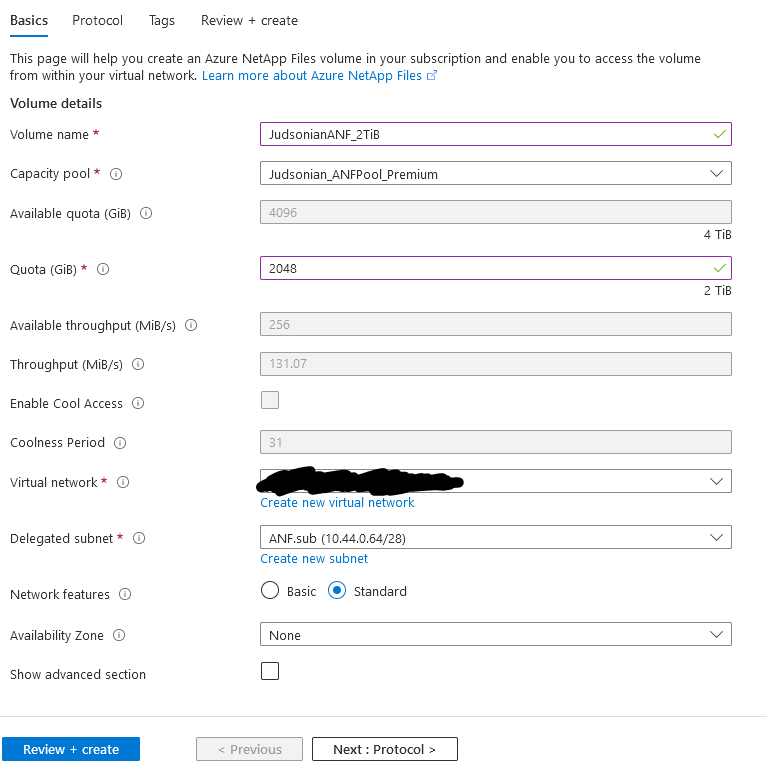
After the pool is created you can click on Volumes on the left then + Add Volume to bring up the volume deployment wizard.
You’ll see where where changing the volume size will impact the available throughput available to the volume. You’ll also see your Delegated Subnet near the bottom. The next page is just basic protocol information and the page after that tags. When all done review and create and you’re done!
No, really, that’s it. Your volume is ready to go. Easy!
Additional Features
There’s a lot more in here, like access control, all the fun of SMB and NFS permissions, and even the ability to template and deploy ANF programmatically. Since I’m trying to keep this relatively short I’m going to touch on a few specific ANF things.
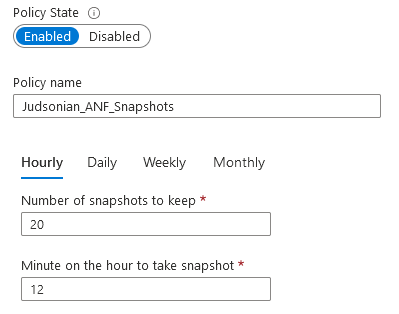
Snapshots, a must in any environment, are easy to configure. Simply create a policy with the retention number and time to capture hourly, daily, weekly, and monthly snapshots. They’re accessible in the share like any on-prem snapshot.
Backups can also be created via policy or on demand. They work a lot like snapshots but aren’t accessible via the share. This allows admins to create and retain secure and long term data copies.
On top of snapshots and backups you can also set up replication for your volume to another Azure region. It’s asynchronous and you can set up the replication schedule. Info on how to setup replication is available here.
If you decided a volume needs more or less performance you can easily change the the pool associated with it by clicking the three dots on the right hand side in the volume list.
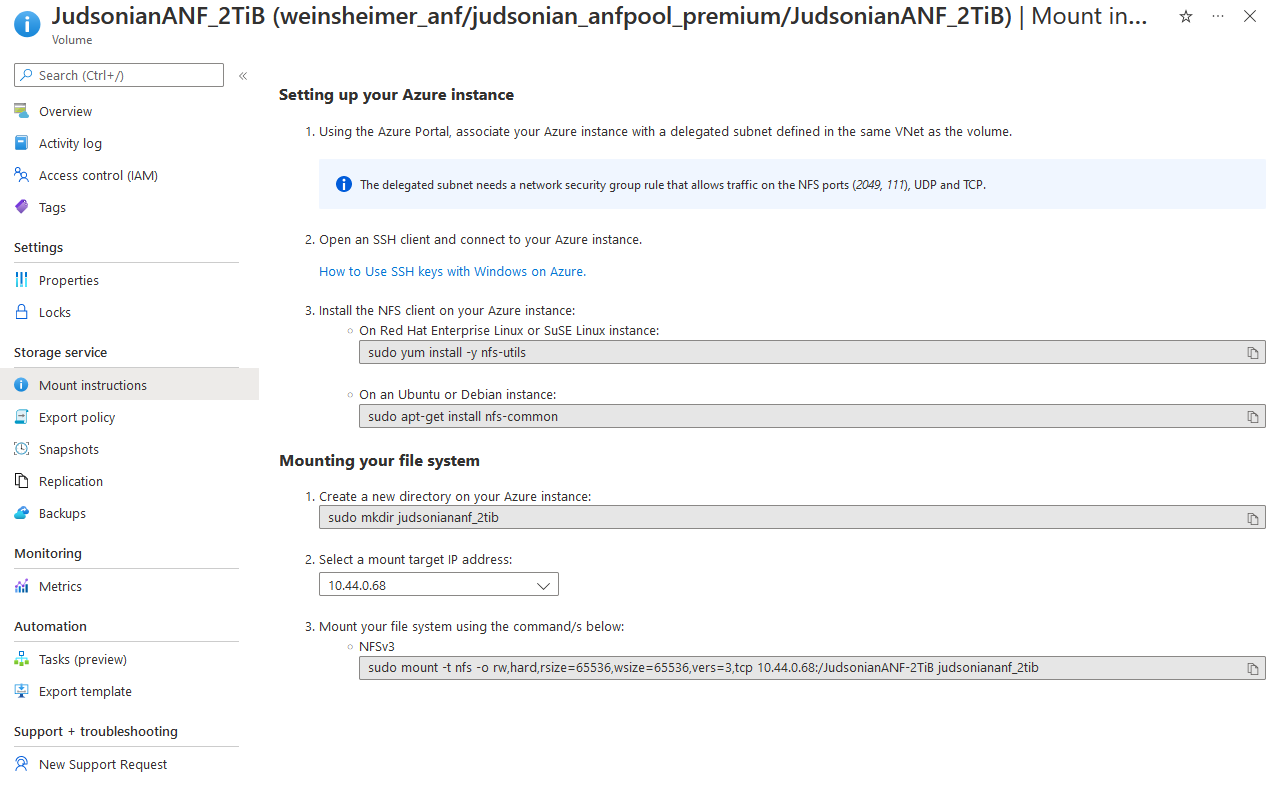
One last cool thing I want to mention is the build in mount instructions. You’re probably more Linux savvy than I am but if you want a quick reference you can click into the volume, go to Mount Instructions, and it’ll have all the commands you need to quickly mount it up to a VM.
In Summary
To wrap things up, Azure NetApp Files is super easy to deploy and an essential part of most Azure environments. There’s a ton of great features, only a few of which I covered in this post. For more info check out the documentation linked below. Hope this was a helpful introduction!
Additional Reading
Post History
- July 1st 2022 – Initial posting
- July 18th 2022 – Some level of basic proofreading