
Before you can roll up your sleeves and start using BlueXP from NetApp you need to set up a Cloud Connector. These are small virtual machines which run a myriad of containers to facilitate all the various bits and bobs that provide a connectivity foundation for the BlueXP feature set. Ideally, well, ideally if you’re using resources in one of the large hyperscalers (AWS, Azure, GCP) you want to deploy a connector there. That gives you the ability to use the Cloud Connector as, basically, a API and command pass through. Essentially allowing BlueXP to talk directly to the hyperscaler to deploy and configure resources within their cloud (eg. deploy Cloud Volumes ONTAP).
But what if you don’t want to deploy within a hyperscaler? It does consume compute and storage resources, albeit usually small in the grand scheme of your bill, but if you’re a predominantly on-premises customer then that’s just a waste. The good news is that you can deploy an on-premises Cloud Connector very quickly.
I wanted to throw together this quick blog because it’s not readily apparently that this is an option. There’s nothing within the BlueXP GUI to suggest that it’s a thing. NetApp’s ‘Get started’ documentation only describes the process for the hyperscalers. Information on how to set up an on-premises Connector is hidden away under “Advanced deployment” when it’s anything but. The reason for the former is simply because BlueXP can’t talk to an on-prem environment directly to establish and build a resource – Connectors themselves work by establishing out-bound connections. The latter is because, I suspect, NetApp wants you to deploy a connector in a hyperscaler because it leads to more direct consumption of cloud resources (and eventual NetApp licensing).
The good news is that setting up BlueXP and a Connector is free, no licensing required. And by using an on-premises Connector you can use your existing resources so there’s no added bill. As always be sure to reference the documentation, as that’s likely to be more up-to-date than this here ol’ blog. At the very least I hope walking through the process here will show you how simple it is to do so you can follow in my footprints.
Step 1: Prep a Virtual Machine
First thing’s first, deploy a virtual machine with 4x cores/vCPUs and 14 GB of memory. Those are hard requirements, the software installer will check and error out if they’re not met.
The supported list of Linux operating systems is pretty small, basically whatever NetApp was able to validate whenever these were rolled out. CentOS 7.6 through 7.9 and RHEL 7.6 through 7.9, along with RHEL 8.6. If you want to use a newer, or different distro of the same level, well you’re SOL. Have your account rep open up a FPVR for official support.
You can, and you didn’t hear this from me, totally just spoof the distro details to get past the software installer’s OS check. Totally 1000% not officially supported, but hey, it works. Simply check /etc for something like ‘os-release’ and swap out the file contents with a support OS’ config. I’ll throw the CentOS 7.9 info down at the bottom for reference.
From a capacity perspective you need a minimum of 100 GiB in /opt and 20 GiB in /var.
From a networking perspective the Connector needs to reach a bunch of NetApp and Microsoft sites, to pull container configs down, the eventual connection back to BlueXP, and other NetApp service integration points. There’s a handful of domains listed in the doc you can whitelist, but you can also poke some holes in your firewall…
firewall-cmd --permanent --add-service=https
firewall-cmd --reload
Step 1.2: Install Docker
The Cloud Connector uses Docker to run a whole bunch of containers. This is either the easiest, or the most annoying, part of this whole process.
If you’re using CentOS, you’re in luck. Just run the following commands straight from Docker’s website…
sudo yum install -y yum-utils

sudo yum-config-manager \
     --add-repo \
     https://download.docker.com/linux/centos/docker-ce.repo

sudo yum install docker-ce docker-ce-cli containerd.io docker-buildx-plugin docker-compose-plugin

sudo systemctl start docker
You can check to see that Docker is running just fine by entering…
sudo docker run hello-world
Now, if you’re using RHEL, then that’s a bit of a predicament. Per Docker’s site, Docker isn’t supported on RHEL unless you’re running the s390x architecture, and I’ve never met anyone who is. What typically works is to use the CentOS packages. I suppose that’s not officially supported, so how NetApp “officially” supports it anyone’s guess. Anyhow, usually it’s as simple as just running the above process on your RHEL system… but of course I’ve seen issues where it balks at the packages. You my have to do a bit of fussing (aka Googling). If you’re trying to set things up on a 9.x system I believe you may need the Docker 8.x repos specifically.
🚨 Important Update 🚨 – As of me righting this, Feb 15th 2023, Connector v3.9.25 doesn’t seem capable of recognizing the latest version of Docker CE (23.0.1) which was released Feb 9th. The Connector package is from Jan 16th… and if I had to guess… NetApp hard coded specific version requirements like they did the OS release.
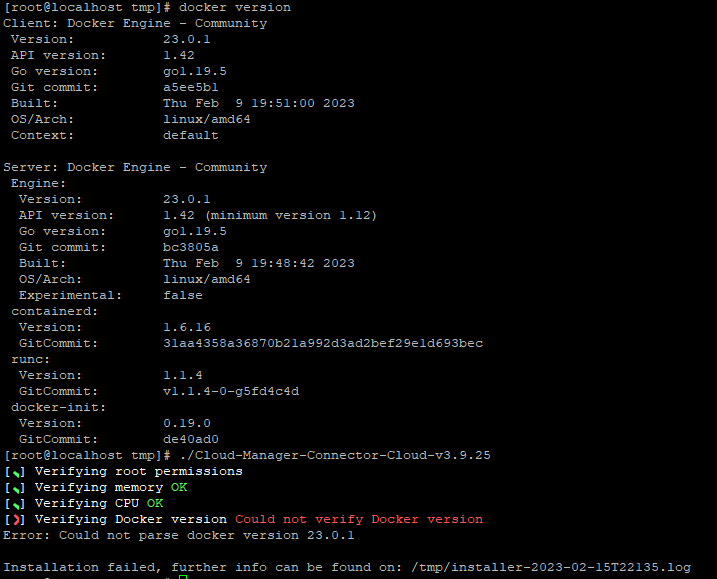
The fix I found was to install the older version docker…
sudo yum install docker-ce-20.10.23 docker-ce-cli-20.10.23
Step 2: Installing the Connector
First up, download the latest version of the Connector installation script from NetApp. As of February, 2023 the NetApp docs say still references version v3.9.23, but version v3.9.25 was released back in January. April 2023 Edit: 3.9.27 is now available to download, and the NetApp docs have been updated to just say <version>.
Fun fact, before the fantastic name change to BlueXP the product started off with the name OnCommand Cloud Manager (release 2.0 was circa 2015 IIRC). It was later shorted to Cloud Manager only to be rebranded a third time with much fanfare to BlueXP late 2022. Why the installation package was never renamed, and then got renamed to “Cloud Manager Connector Cloud” instead of something BlueXP related – after the name change to BlueXP – only Robert Stack knows the secret to.
Once you’ve downloaded the software and copied it up to the server (having it directly accessible from the system would be too easy) start by double checking that Docker is enabled and running/adding it to symlink…
sudo systemctl enable docker && sudo systemctl start docker
Then remove proxy variables from the system, which will cause the install to fail if configured…
unset http_proxy
unset https_proxy
Up the permission on the script to it’s executable,
chmod +x Cloud-Manager-Connector-Cloud-v3.9.25
And finally run…
./Cloud-Manager-Connector-Cloud-v3.9.25
If you need to you can also use –proxy and –cacert to pass specific proxy and CA signed certificate details if need be (see official doc for more info).
If everything is set goes as planned you’ll see the script go through a couple prerequisite checks, set up Docker, then start the OCCM service. If there are any issues the script will error out and tell you why, with a link to a log file that may or may not be helpful. It seems like quite a few of the requirements are hard coded into the script so if things aren’t exactly perfect you’ll get an error quickly.

At the very end you’ll see “Waiting for OCCM” and it’ll spin while the last container is set up and waiting for response back via localhost:8080. If for some reason that fails, the first thing I would try is restarting docker and re-running the install. If that fails again, probably time for a support ticket.
You can run docker ps to query the running containers. At time of blog creation there’s an initial config of just 3 containers…

Step 4: Connect the Connector to BlueXP
Next up it’s just a matter of connecting the Connector up to BlueXP. For this I found that logging into BlueXP before accessing the local Connector is the best order of operation. That way you’re already authenticated and the Connector is just a click-and-wait step.
In short, open a browser window and log into BlueXP so you’re just sitting at your Canvas. Then open up a new tab in the window and navigate to the connector’s IP address. You’ll see a screen like this…
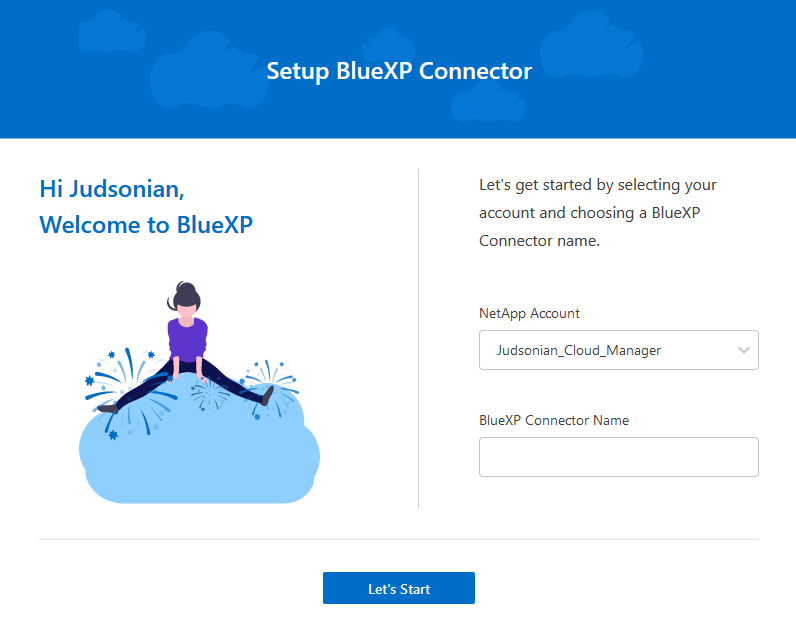
Since you’re already logged into BlueXP you should already see the NetApp Account box populated. Just enter in a name for the Connector and click Let’s Start.
Step 5: Wait
At this point the Connector will phone home and start grabbing new containers to deploy. In my experience this can take 10-15 minutes, your mileage will vary.
You can watch this by running docker ps every so often, or docker stats which will give you a live update of all the containers.

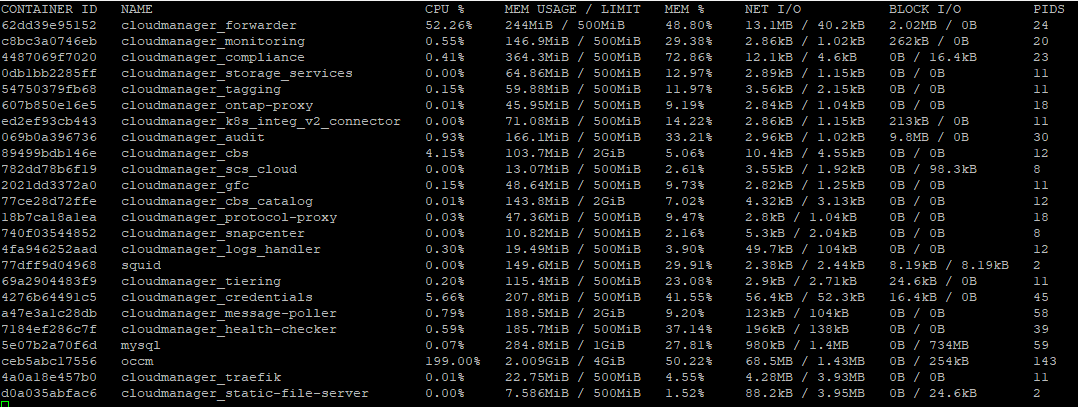
Eventually you’ll end up with over 20 containers.
If you return to the browser tab to the Connector’s IP you’ll see something like this,
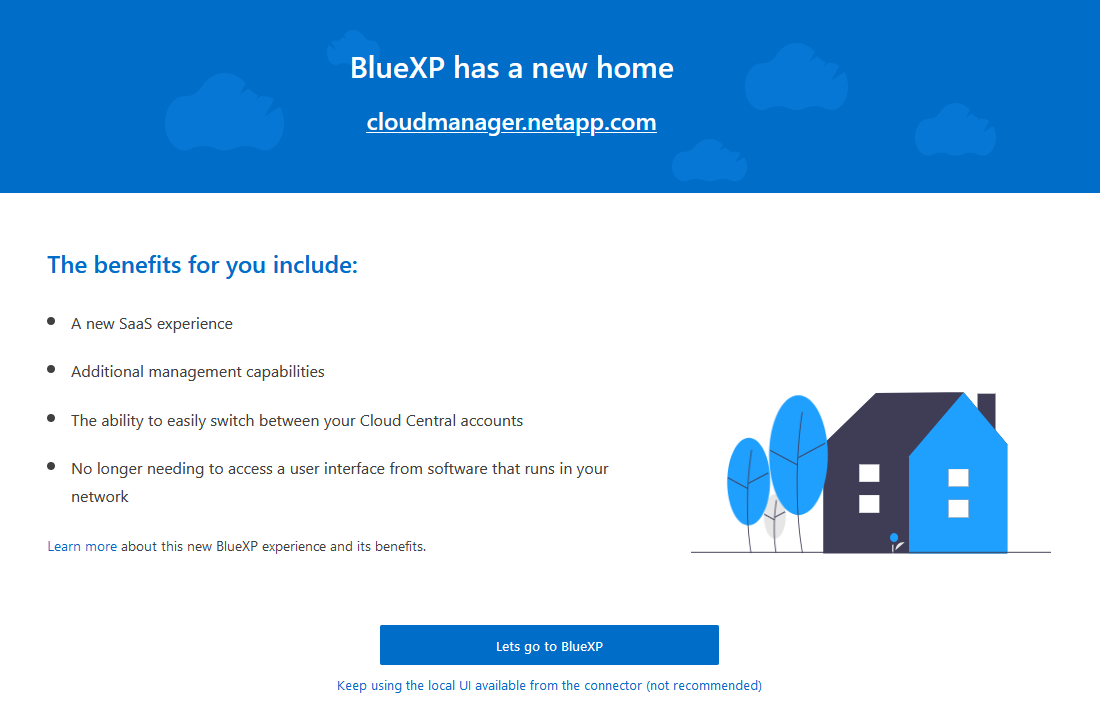
There’s a whole bunch of nonsensical stuff on that page so I recommend closing the tab and never speaking of it again. Repress those logical instincts. Instead return to the tab where you had BlueXP open and you’ll now see the Connector available in the top right corner.
Congrats, your local connector is now enabled!
Now it’s time to discover on-premises resources or start deploying other components like Data Sense.
Reference: CentOS 7.9 Release Info
If you wanted to spoof your connector’s OS deets to make it past the Connector install software feel free to use this CentOS 7.9 config as a reference…
NAME="CentOS Linux"
VERSION="7 (Core)"
ID="centos"
ID_LIKE="rhel fedora"
VERSION_ID="7"
PRETTY_NAME="CentOS Linux 7 (Core)"
ANSI_COLOR="0;31"
CPE_NAME="cpe:/o:centos:centos:7"
HOME_URL="https://www.centos.org/"
BUG_REPORT_URL="https://bugs.centos.org/"

CENTOS_MANTISBT_PROJECT="CentOS-7"
CENTOS_MANTISBT_PROJECT_VERSION="7"
REDHAT_SUPPORT_PRODUCT="centos"
REDHAT_SUPPORT_PRODUCT_VERSION="7"
Reference Links:
Version Info:
- Feb 15th, 2023 – Initial Posting
- April 6th, 2023 – Minor tweaks, still need a proper proof read